
This recipe for Mutton Biryani is simple, quick, tastes great and looks amazing. It is the South Indian kind of Biryani, popular in Tamil households especially during festivals.

I recently made this for Easter and as usual, it was welcomed. The best part is that it tastes even better on the next day, so I always try to make some extra amount! You must try at least a bowlful on the next day. Let me know if I am not right 😊
Biryani in India
Indian cooks have their own favourite style of cooking the popular Mutton Biryani. The sheer variety of this delectable dish is amazing. I’m sharing a quick and interesting read about the origin and history of Biryani in India.
https://www.thebetterindia.com/60553/history-biryani-india/
Mughlai, Awadhi, Lucknowi, Arcot, etc. are all variations of this festive dish. Chicken Biryani, Egg Biryani, Paneer and Vegetable Biryani are also popular. But at our home, Biryani equals Mutton Biryani! Because, according to my husband, the others are not Biryani at all! 🤣
So here it is, our version of the Mutton Biryani that you can dish out to your credit. I have simplified various procedures to make it quick. If you have a food processor, it can done even more quickly.
6 Steps to Mutton Biryani
- Cooking the Mutton
- Chopping and Grinding up all the Other Ingredients
- Frying the Chopped and Ground Masala
- Adding the Cooked Mutton
- Stiring in Hot Water and Some Flavours
- Dumping in the Rice and Cooking it till Done
Cooking the Mutton for the Biryani
We’ll get to cooking the mutton, but first ensure you get the good cuts of meat from a trustworthy and known source.
It is best if you buy a small portion of meat from the chest and the rest from the shoulder. Don’t go in for boneless meat, as the bones add a characteristic flavour.
They must sell you meat that is good for Biryani. If the meat is too tender, it will disintegrate while getting cooked. The final Biryani will look as if it is full of bones alone.
If you source it from a place where they have already cleaned it, there is no need to wash it. If you find it needs cleaning, you do have to wash it, but be very quick. Under no circumstances should you let the mutton soak in water. This ruins the taste as the meat will absorb water.
Cook the meat well. I use a pressure cooker for this. Add the mutton pieces in the cooker with water and the salt and spices. Fit the lid securely. Keep on high heat. Soon you will see a steady amount of steam rising from the vent. If is now time to whip out the whistle/ weight.
After you firmly place the whistle, you must wait for the cooker to attain full pressure. You will see the whistle jiggling and also hear it hissing loudly. It might even release the pressure once by “whistling” loudly.
At this point, reduce the flame. And now allow the meat to cook for 10 minutes. Switch off the stove. Let it release the pressure naturally. Do not try to cool it or hasten the pressure release.
Chopping and Grinding
While the cooker is working, set a thick bottomed, large pan on low heat (for the next step). Wash the rice till the water runs clear. I have used long grained Basmati rice today. However, you can choose the variety you want to use. In the South, a smaller variety called Seeraga Samba is used for this dish. Add water to soak the rice completely. Cover and keep until it is required.
Then start on the chopping and slicing. Ensure you wash the produce well. It is fine to use a food processor for the onion slicing. However, chop the tomatoes using a serrated knife. Grind the coriander with the chillies using a small jar of the grinder. In order to help the grinding, you can add some water.
If you have some pre-ground ginger garlic paste, you can use that, else grind some now.
I prefer adding the mint leaves chopped and not ground. The flavours are better that way.
Ta daa! The hard part of the Biryani is actually over!
Frying the Chopped and Ground Masala
By now your thick bottomed, large pan will be heated and ready for use. I add a mixture of oil and ghee/ butter for best results. Add the whole spices first. I must mention an unusual spice called kalpasi/ dagad phool/ stone flower here. It is OK if you don’t find it, the usual cloves and cinnamon will do. But it does add a unique aroma if you use it.
For those who do not like whole spices, this step can be avoided and instead you can add some Biryani masala later. This is available as a ready mix (or make your own!)

Be very patient as you fry the onions. While it is frying, make preparations for the sides. Don’t rush it by increasing the heat. The detailed steps to adding the ginger-garlic paste, the coriander-chilli paste, the tomatoes, and the dry spices are given below. Just don’t let the masala stick to the bottom of the pan.

Adding the Cooked Mutton
You will notice that by now the hissing from the cooker’s pressure has subsided. So you can remove the weight and open the lid of the cooker.
Check if the meat is cooked. In order to do this, pinch off a bit of the mutton off the bone. Good cuts of meat would be perfectly done. Also, the pieces will not be chewy or leathery. In case it is not done, remember to cook it once more, and also remember to change your meat vendor!
The masala in the large pan is now giving out a great aroma and waiting for the mutton. Remember to use a slotted spoon to drop only the pieces of mutton in the masala. Reserve the liquid.

The cooked meat needs to fry with the masala for 5 minutes on low flame. Since you do not want to break the pieces up, you must use a spoon very gently to turn and toss it around the pan.
During this time, start the boiling of water step. Also separately boil some eggs as a side dish. Also prepare for the sides with the curd.
Stiring in the Hot Water and Some Flavours
While the mutton and spices are frying, start boiling the water for the Biryani. Basically, the volume of liquid should be twice the volume of rice, minus 1/2 cup to adjust to the onions and tomatoes added. You need to measure it carefully.
And while calculating, remember to include the liquid you have reserved from the pressure cooker and water from the soaked rice. The mixer jars can be rinsed to gather all the ground masalas sticking there and this water can be added too. In case you have any whey, you can use it to replace half of the water. And also include curd (and coconut milk if using) in your calculation. The quantities are mentioned in the recipe below, so you don’t have to worry.

Boil the liquid in the pressure cooker in which you cooked the meat. Just don’t add the coconut milk to it. In the meantime, add the curd to the mutton and spices, which are golden brown and smelling amazing.
Add the boiling liquid to the mutton. Add the coconut milk if using. Check the seasoning. This is your chance to add salt and pepper or even chilli powder in case you need more spice.
Now add the special ingredients: chopped mint and coriander, juice of a lime and the biryani spice in case you do not use whole spices.

Dumping in the Rice and Cooking it till Done
Once the entire pot is simmering, reduce the flame. Add the rice. Again test the salt. Adjust if needed only. Add some lime juice if you like a more tangy flavour.

Cover and cook for five minutes, till all the water is absorbed and the rice is perfectly cooked. You can complete the sides that go with the Biryani in this time.
The Sides
Peel the eggs. Typically you would serve them whole. You could cut them and convert them into a fried version that is also very popular.
The Onion Pachadi/ Raita is a must have side dish with Biryani. Another dish I add is the very simple sweet curd and banana mixture sprinkled with cinnamon powder. No Tamil household will be satisfied without the quintessential Curd rice or Thair saadam! The dessert, vermicelli payasam is also a welcomed addition to the menu.

These sides help to tone down the spiciness of the Biryani while they add their own unique and characteristic tastes.
Some people enjoy a “Salna” with their Biryani. Personally, I don’t. But my mother makes a neat “Kurma” with this, and I’ll share that recipe too!
Allow the Biryani to cool for a few minutes before serving to avoid breaking up the rice and the mutton pieces. As I mentioned earlier, the Biryani develops a special and matured flavour on the next day, so be sure to taste the leftovers!
That being said, there is nothing like fresh Biryani from the pot. Enjoy!
Tag me #kitchen.rings on Instagram or on Twitter or Facebook @SheetalCares when you make this Biryani! You can also write your experience with the dish in the comments section below.

Mutton Biryani
Course: MainCuisine: IndianDifficulty: Medium6-8
servings15
minutes40
minutesMake this Mutton Biryani to complement the joys of happy occasions. It is a favourite in South Indian households and also simple to prepare.
Ingredients
1 kg mutton (from chest and shoulder)
3 1/2 c rice, rinsed till water is clear and soaked in 3 c water
3 tbsp oil + 1/4 c ghee/ butter
4 big onions, (sliced long)
2 tomatoes (chopped fine)
1 c + 2 tbsp coriander leaves ( chopped)
4-8 green chillies (to taste mild or fiery accordingly)
4 sprigs of mint/ pudina leaves, (chopped fine)
Few dry fruits (cashews and raisins)
1 heaped tbsp ginger-garlic paste
1 tsp + 1 tsp chilli powder
1 tsp turmeric powder
3 tsp salt
1 tsp coriander powder
1/2 tsp fresh garam masala/ all spice/ biryani masala powder
OR Whole Spices :
1/2 tsp kal pasi, 1 bay leaf, 3 cloves, 1 inch stick of cinnamon, 5 pepper corns, 2 small cardamoms.
People who love spices can add both whole and powdered. You can also include 1/2 tsp jeera powder and 1/2 tsp pounded aniseed with the powdered spices.1-2 limes (extract about 4 tbsp of juice)
1/2 c thick curd/yoghurt ( slightly sour)
1/2 c coconut milk (optional)
Directions
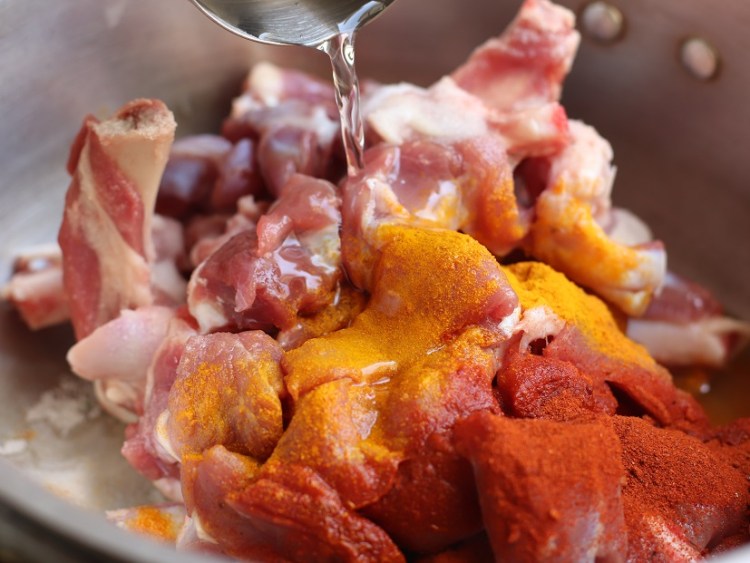
- Mix the mutton it with 1/2 c of water, 2 tsp salt, 1 tsp of chilli powder and 1 tsp of turmeric powder. Cook it well. In a pressure cooker, it will take around 10 minutes on low heat, after the first whistle.
- Wash the rice several times. Soak in 4 c of water.
Get onions and tomatoes ready.
Grind the chillies with a cup of coriander leaves, adding a few tablespoons of water. - Heat the pan and add the oil. When oil is hot, add the ghee or butter. Fry the cashews for 30 seconds, add raisins. Remove in bowl. You can also fry a few slices of onions and reserve all this as your garnishing.
Remember to work only on low-medium heat. If using whole spices, add them to the oil-ghee mixture now. - Add the sliced onions. Fry well for 5 minutes or till translucent. Add the ginger-garlic paste. Fry for 3 minutes. Now add the coriander-chilli paste. Fry well, stirring the mixture occasionally. Now add the tomatoes. Fry till you get a beautiful aroma. Approx 5 minutes.
- Add dry spices and fry well. The mixture should look well fried, Keep stirring the mixture so that it does not get stuck at the bottom of the pan. and it cooks evenly.
- Use a slotted spoon to pick out only the pieces of the mutton and add it to the masala. Mix gently till the masala is coated on it. Fry for 5 minutes. Don’t let the spoon break the pieces.
- Meanwhile, pour the reserved liquid from the mutton in the measuring cup. Rinse the grinding jar and add the liquid. Also add the coconut milk if using, (else add water) and make the volume to 2 cups.
Drain the water from the rice into this. You can use the cooker itself to boil this liquid. - Add the curd to the fried mutton pieces. Mix and cook for 5 minutes. Now add the hot liquid. Let it boil.
Check the salt. Add chopped coriander and mint leaves. Add 3 tbsp of lime juice. If you find it less spicy, you can add a small quantity of chilli powder or pepper powder. - Add the rice to the simmering liquid, cover and cook till rice is done (about 5-6 minutes).
Sprinkle a tbsp of lime juice more. It will help the grains to be fluffy and not stick to each other. Leave undisturbed for 5 to 10 minutes. - Serve hot. Garnish with fried nuts, fried sliced onions and chopped coriander. Enjoy with all the sides.
Notes
- Once the Biryani is cooked, handle the grains and the pieces with care, so as to not break them.
- Serve with boiled eggs, onion pachadi, banana in sweetened curd. As a next course, serve curd rice with some fried dry chillies. Finally serve payasam made with vermicelli as the dessert.
Hi! Tried your mutton biryani recipe and it was awesome. My family loved it very much. The aroma was really good especially if corriander and pudina. Recipe was really simple. Thanks for sharing this recipe step by step. Would definitely try your other recipes. Love ❤️
Hey Romila!
Two things:
1. I loved that you tried it out and it came out good! Yeah! Doing a little dance here!
2. I am so sorry I am reading this after all these days! Shameful!
I will henceforth appear here also…and not let Instagram derail my blog! It does take up all my energy right now!
No more, I promise!
Keep trying out new stuff!